In another blog, I dove into the most overlooked part of your design client process: the offboarding. I talked about what the offboarding process for design clients is and what all the elements of the design client offboarding process are.
So now let’s dive into how you can organise and automate the steps of your design client offboarding using Dubsado.
In this blog, we’ll dive into all the steps of your design client offboarding process and what this looks like in Dubsado. I’ll cover:
- Final Invoice
- Final File handover or Website handover
- Thank you email + client gift
- Feedback Request + creating a portfolio item
- Follow Up
Just a quick note: I don’t have my Dubsado set up as a designer anymore (and I don’t like sharing back-end systems of clients), so the screenshots below are from my current services but should give you an idea of how you can use Dubsado
But before we dive in, these posts on design client processes might be helpful for you as they come before the offboarding:
- The most overlooked part of your design client process: offboarding
- How to streamline your brand or website design client process
- Dubsado for Designers: How to onboard clients (here I also explain a bit more about what Dubsado is)
The design client offboarding workflow
Client offboarding is simply the steps that you take at the end of a project to not only round off the project but also to make sure the client is happy and can use the brand materials or website successfully on their own. However, one mistake that many designers make when thinking about the client offboarding process is that they assume it means their work with the client is over.
That’s not necessarily the case. And even if it is, the way that you take your client through this process determines the way they think about your business going forward and impacts if they would come back themselves for more work or recommend you to others.
This is an overview of the steps that are included in the offboarding process;
- The client approves final updates to brand or website design
- Send final invoice
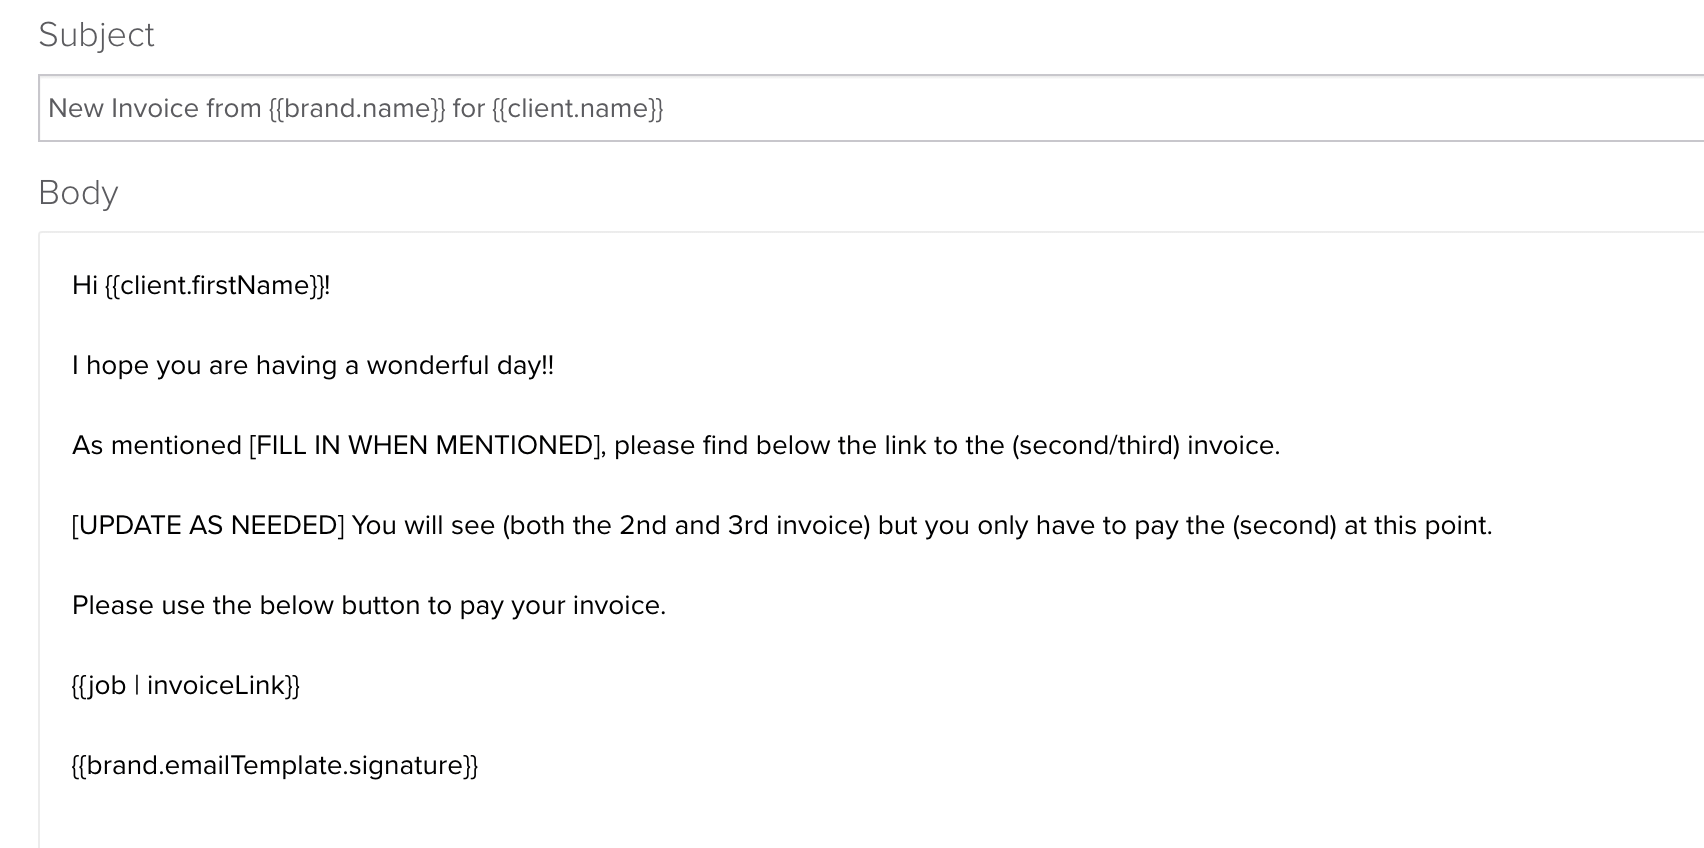
- In Dubsado you need to update the final invoice. Once updated you can send the invoice from the system with the email template to let your client know that once the final invoice is paid they will receive their final files or get the website handed over.
- In Dubsado you can set up your workflow to create a task for you to check if payment is received or you can use the automatic payment reminders when creating the invoice
- After the payment is received: You either send the final files with a brand board + brand guidelines and schedule a call to walk them through the files and guidelines or schedule a training for website handover.
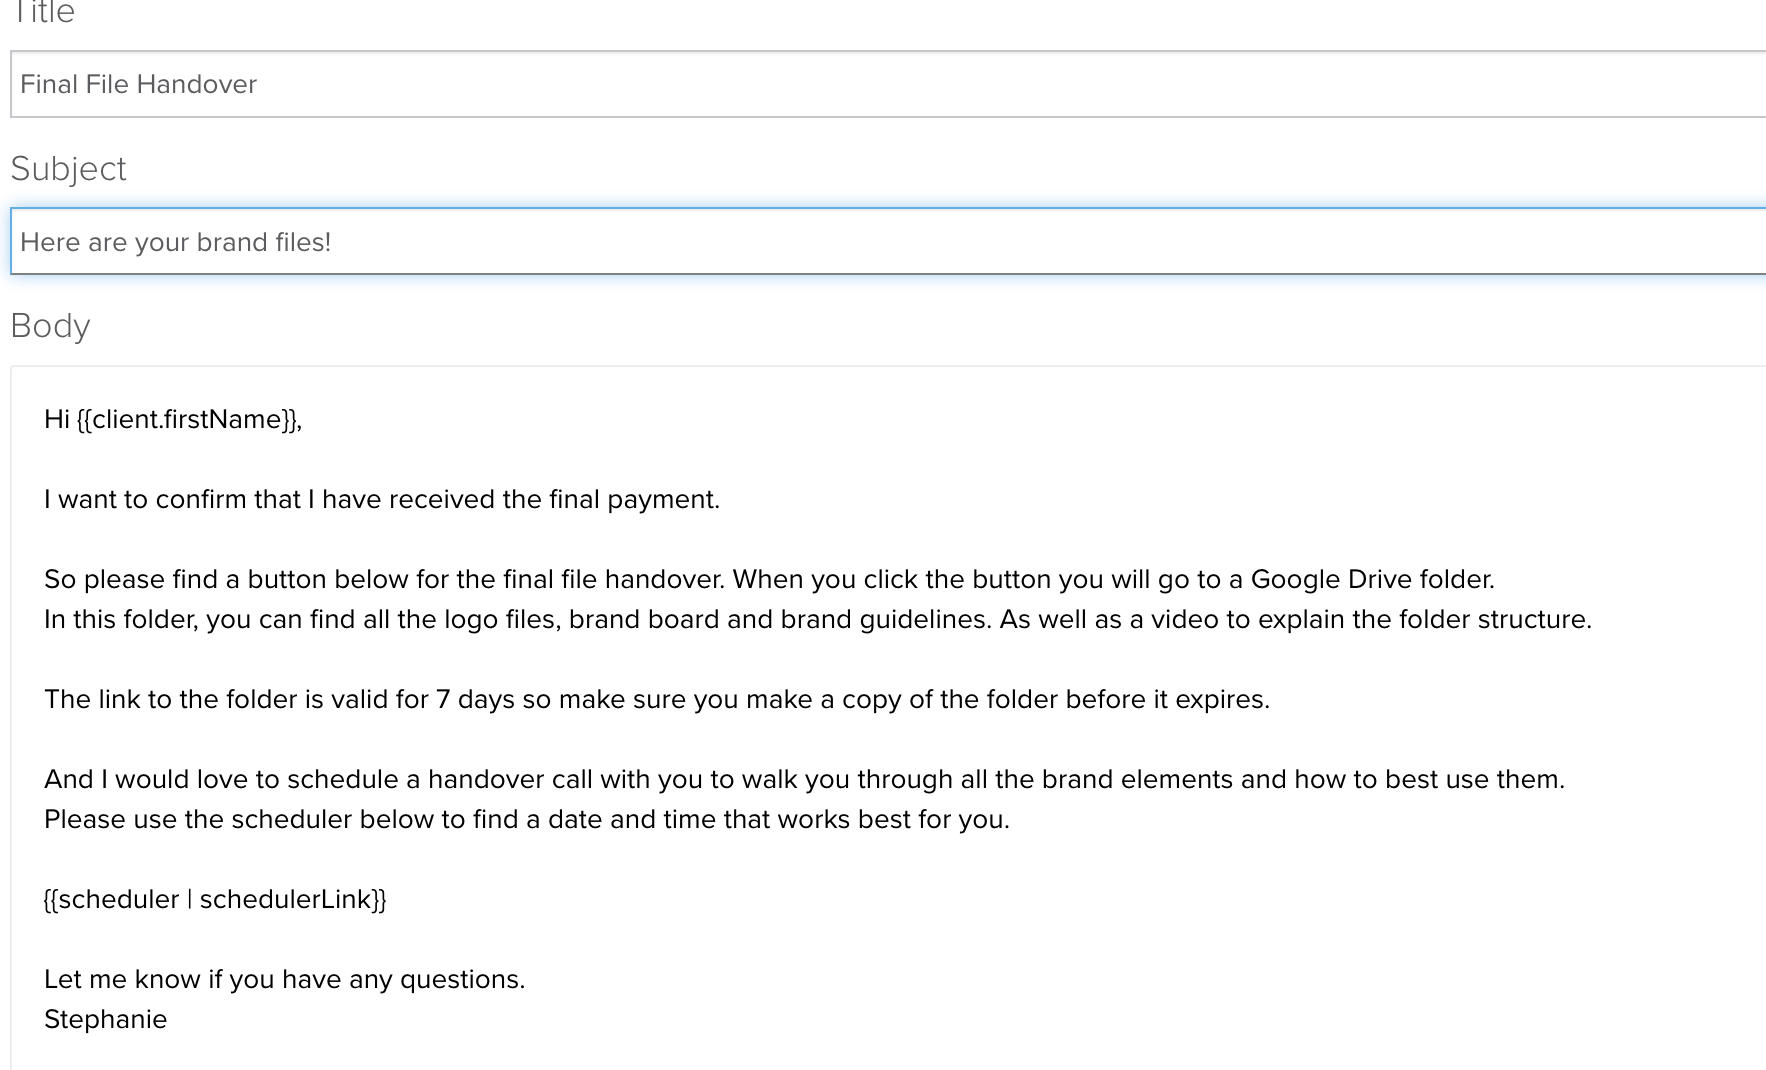
- In Dubsado you use one of the email templates to let the client know you have received the payment and would love to schedule a call with them for the handover. The email includes a link to the scheduler in Dubsado so that they can book the call on a date and time that works best.
- The client books the call
- Dubsado sends the client an email to confirm their call and information on how to reschedule or cancel
- Dubsado sends the client a reminder email (24 hours before) about the meeting
- The handover meeting between you and the client takes place
- Send a thank-you email the day after the handover meeting
- In Dubsado you use one of the email templates to send the client a thank you email. The task is set to approve so that you can personalise the email.
- Order a client gift
- In Dubsado there is a to-do to order the client’s gift
- Asking for feedback
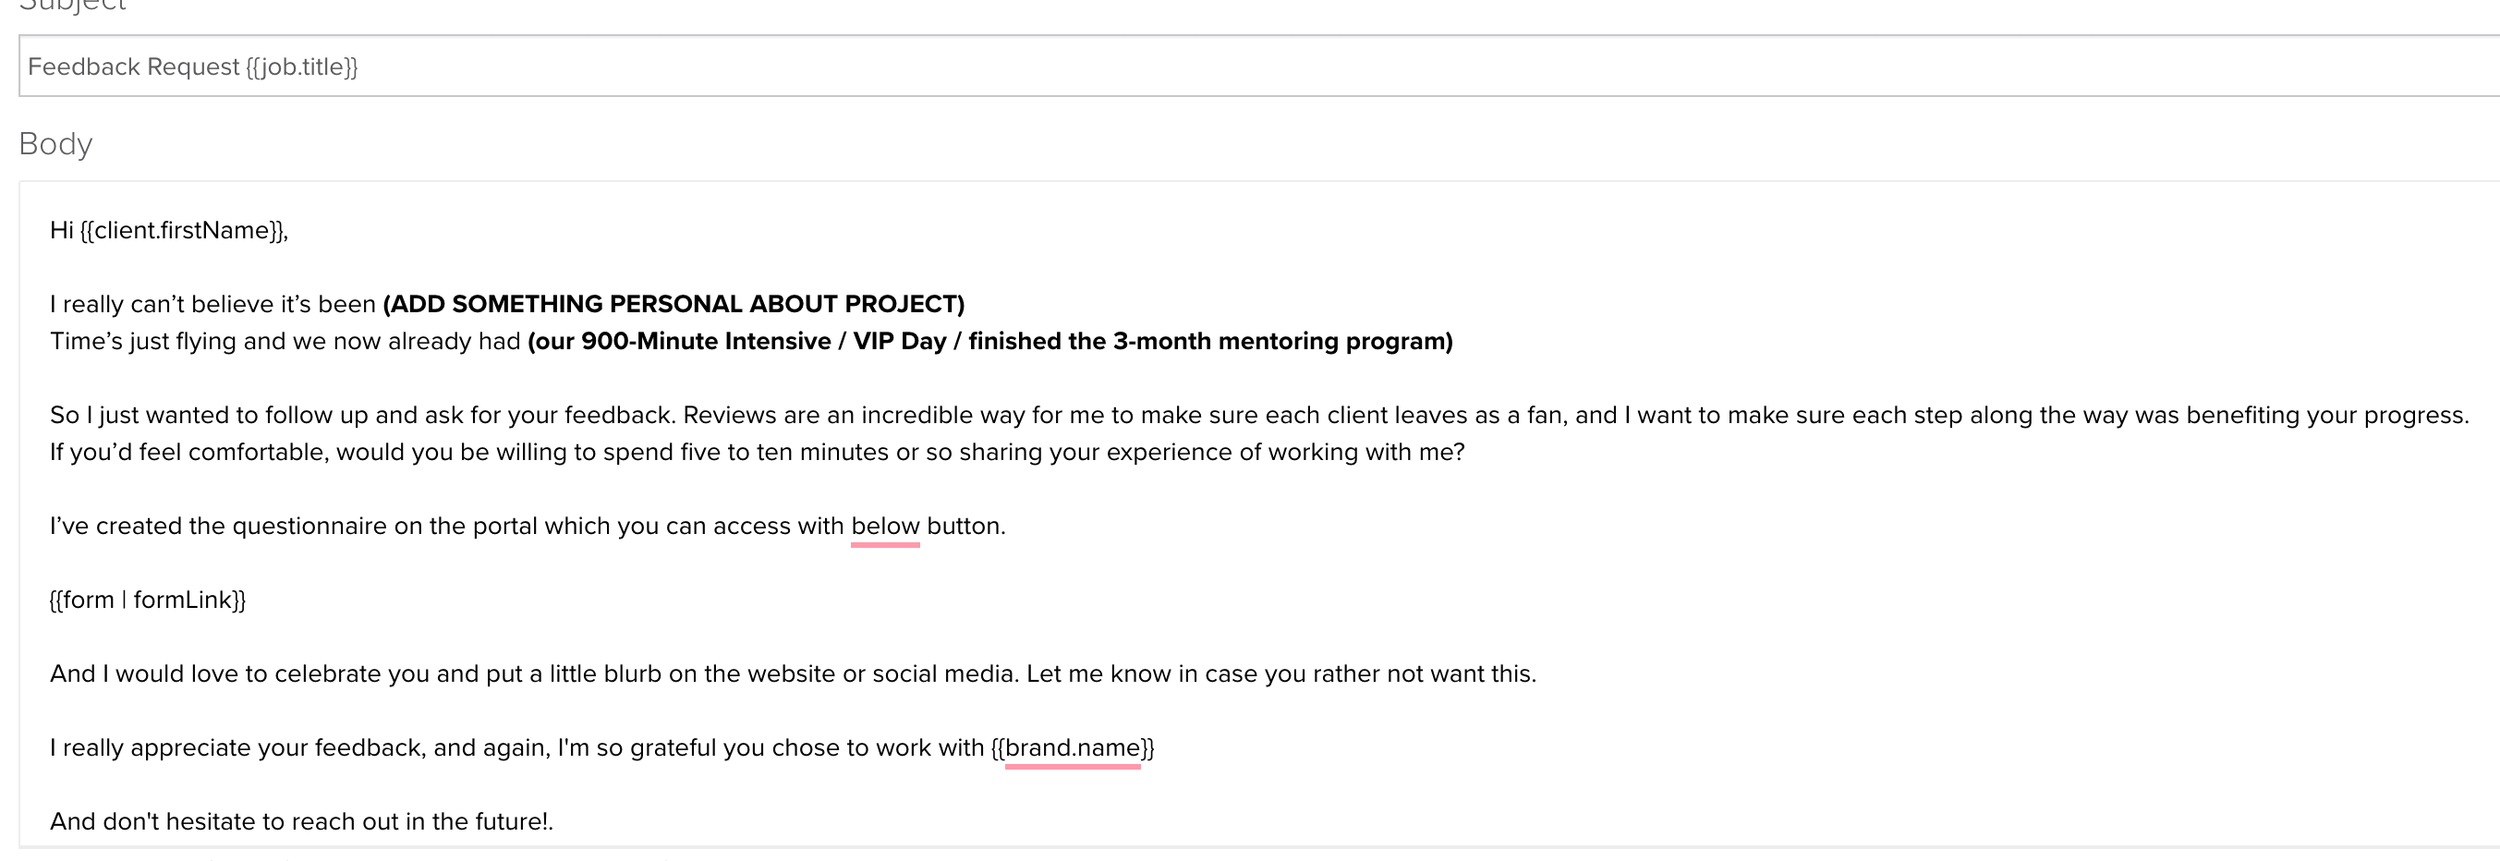
- In Dubsado you use one of the email templates to ask for feedback. The email includes a link to a form in Dubsado with questions so that you can make sure you get a valuable review that you can use on your website.
- In Dubsado there are automatic email reminders for 7 and 14 days in case the form has not been filled in
- Create portfolio item
- In Dubsado there is a to-do to create a portfolio item for your website for this project and to share it on social media
- Finish Admin for the project (this can be archiving folder or projects in your project management system, updating financials)
- Follow-ups
- In Dubsado there is an automation to send follow-ups after the project. These are set to approve to that you can personalise them.
You’ll notice that I’ve mentioned the word email a lot (12 times, I counted), because well, there are a lot of emails we send to our clients during a design project. But you might find that, even though you send out similar emails regularly, you keep writing them from scratch every time. If so, than it’s time to create email templates to help streamline your communication and ensure consistency. Besides that this will save you time, more of your energy can be spent on crafting the best designs
Not sure how to get started with creating your email templates? Enter 40+ email scripts for brand and website designers. A template with more than 40 email scripts from kickstarting conversations with new inquiries and sending out proposals to presenting your concepts and wrapping up the project with the final file handover. So that you can spend less time on emails and more time doing what you love – creating amazing designs!

Sending the final invoice
The first 4 steps are all related to sending the final invoice after the client has approved the final updates to the brand or website design. It would be good to have this approval by email but you can also use the subcontracts for this in Dubsado.
- The client approves final updates to brand or website design (I’ll give an example in the final file handover section).
- Send final invoice. I always like to mention that an invoice is coming up, so then I’ll reference that when sending it.
In Dubsado you need to update the final invoice with additional charges if needed.
Before sending this final invoice, always check if there is something you need to add like additional website pages that were outside of the contracted number of pages or if you bought custom fonts. Any line items that are already in there can be updated by clicking the arrow on the right-hand side of the line item. And if you need to add new charges you can click New Line Item (just above payment plan).
Once updated you can send the invoice from the system with the email template to let your client know that once the final invoice is paid they will receive their final files or get the website handed over.
A couple of things to consider:
- If you send the final invoice before sending the final files or hand over the website make sure that this is also stated in your contract. In the email template that you use to send the invoice, you can mention this again as a reminder.
- Make sure you either have a task in your workflow for you to check if payment is received or you can use the automatic payment reminders when creating the invoice. You can use the default email template for this, but I have created my own ones where the tone goes from this is a friendly reminder to the payment is no xx time overdue and if payment is not received before xx date then (fill in depending on the service and where in the process you are). Again, this is something you need to cover in your contract as well.
Final brand design files handover or website training and handover
After you have received the final payment you can start the handover process. I feel it is very important in this stage is to not just end the project with an email with a link to the files or to confirm the transfer of website ownership. You want to make sure your client is set up for success, also after working with you.
It can be easy to forget how overwhelming a new website (especially when it is on a new platform) or a folder with countless brand files can be when you work with these things daily as a designer. But most of our clients need some support in this phase. So I always added a call to this phase regardless if it was a brand or website design client.
But first, let’s go back to the actual handover and all the steps this includes in the workflow:
- After the payment is received: You either send the final files with a brand board + brand guidelines and schedule a call to walk them through the files and guidelines or schedule a training for website handover.
- In Dubsado you use one of the email templates to let the client know you have received the payment and would love to schedule a call with them for the handover. The email includes a link to the scheduler in Dubsado so that they can book the call on a date and time that works best.
For more details about how to handover design projects continue reading the most overlooked part of your design client process: offboarding
When you have finished uploading all the files to your Google Drive folder you can use the share option to invite your client to the folder so that they can download the files. In addition to this, you can send a sub-agreement in Dubsado to send the link and mention how long the link is available (I always used 7 days). But the main reason for sending this sub-agreement is because it has a line at the bottom (like all agreements in Dubsado) for a signature. So I would always add a line saying; By signing below you agree that all logo files have been sent and approved.
Just like with the signing off of the final revisions, it’s good to have these approvals on paper. Luckily I have never had to use it, but it provides you with proof the client has signed off in case they come back later saying they are not happy with the end result or never approved a certain revision. It can feel like a bit much to ask for this signature every time but you’ll be glad you have it when you do run into a situation like this.
Handover Call
In the email template you use to let the client know you have received the payment and you are preparing the final files, you can include a link to a scheduler in Dubsado so that they can book the call on a date and time that works best.
To execute this step you need the Dubsado Scheduler. I won’t go into details on how to do this, but you can find a step-by-step guide here.
In the workflow you will see the following steps for this part of the process:
- The client books the call
- Dubsado sends the client an email to confirm their call and information on how to reschedule or cancel
- Dubsado sends the client a reminder email (24 hours before) about the meeting
- The handover meeting between you and the client takes place
Thank you email and client gift
On the same day or the day after the call, you can send your client a thank you email. In Dubsado you will have an email template to send a thank you email, which also includes a link to the recording (you can save a copy in the handover folder) and the link to the final files for brand design or SOP’s for use of the website platform for a website design project (you can make these yourself or link to the website of the website platform).
I would recommend setting this task to approve so that you can personalise the email and mention some things about the project.
- Send a thank-you email the day after the handover meeting
- In Dubsado you use one of the email templates to send the client a thank you email. The task is set to approve so that you can personalise the email.
The next steps in the workflow are optional but I’ve had so many nice responses to this that I do this with most projects. What the gift is will depend on the client and how much I know about them personally but it can be anything from stickers with the new logo to a small box with a notebook, pen and a candle.
- Order a client gift
- In Dubsado there is a to-do to order the client’s gift
Feedback Request + Portfolio piece
To next step in the design client offboarding process is asking for feedback and using that to create a portfolio item on your website. In the workflow, this covers the following steps;
- Asking for feedback
- In Dubsado you use one of the email templates to ask for feedback. The email includes a link to a form in Dubsado with questions so that you can make sure you get a valuable review that you can use on your website.
- In Dubsado there are automatic email reminders for 7 and 14 days in case the form has not been filled in
It’s important to understand that not all feedback is created equal. A testimonial saying ‘you were so nice to work with’ does not help you to sell your services as much as a testimonial that mentions the struggles of your client before working with you, what the process was like and what kind of results they are seeing after the launch of the new brand or website.
So to get this type of testimonial you need to help your clients out a bit and this is where a form in Dubsado comes in. You only have to create this once and then use an email template to ask for feedback. The email then includes a link to the form in Dubsado with the questions that your client can fill in. Just make sure you also have email templates for automatic email reminders for 7 and 14 days in case the form has not been filled in.
Once you have received the form back you can use the answers to create the testimonial and add it to your website. After that, it’s time to create the portfolio item.
Follow up emails
The final step in this offboarding process is following up with your client after the project.
- Follow-ups
- In Dubsado there is an automation to send follow-ups after the project. These are set to approve to that you can personalise them.
This is a great way to check in to make sure they are not running into any problems implementing their new brand or using the website. But this also shows your clients that you really care about them and want to keep the relationship going.
In Dubsado you can create an email template as a base for the follow-ups but I like to have these set on approval so that I can personalise them. I often have contact anyway with past clients so I like to add something personal to these emails and ask them a question. I don’t actively sell in these emails but I have often received new work through these follow-up emails. Often these past clients already needed support with something but because of their overfull to-do lists kept putting it off but now I was top of mind again, they jumped on the opportunity to get extra work done.
AND THERE YOU HAVE IT
There you have it, a step-by-step overview about how you, as a designer, can use a CRM like Dubsado to streamline your client offboarding process and use this to land new clients. Want to learn more about Dubsado and client workflows? Check out these blogs and free resources:
- Dubsado for Designers: How to onboard clients
- The Client Onboarding Checklist for Designers
- How to set up the Dubsado Scheduler
- Get your Dubsado Account setup sorted
- Why is it so hard to set up your Dubsado
- How to streamline your brand or website design client process
Or take the shortcut with the Step-by-Step Dubsado Setup Guide or the Elevate your client workflow with Dubsado Training which includes 4.5 hours of video recordings from the live workshops held in February 2024, 20 email templates designed specifically for use in Dubsado and the Step-by-Step Dubsado Setup Guide


